While Proton Mail is known for security and privacy features, it also offers a powerful suite of tools to transform your inbox into an efficient hub. Whether you want to change the app look, set up a custom domain, activate dark web monitoring, or use an on-device AI to draft pristine emails, you have ample options to optimize your workflow and maximize productivity. Here are the top 10 Proton Mail game-changing tips to conquer your inbox chaos in no time.
Although Proton Mail has apps for all platforms, this guide focuses on the web version you can access on Windows, Mac, and
Chromebooks
.
Related
Why I ditched Gmail for Proton Mail
Two decades of Gmail was enough for me, thanks
9 Use themes to change the entire inbox look
The default dark blue theme may not be everyone’s cup of tea. Thankfully, Proton Mail offers several theme options. You can also change the default fonts and font size. Here’s how.
- Go to Proton Mail on the web.
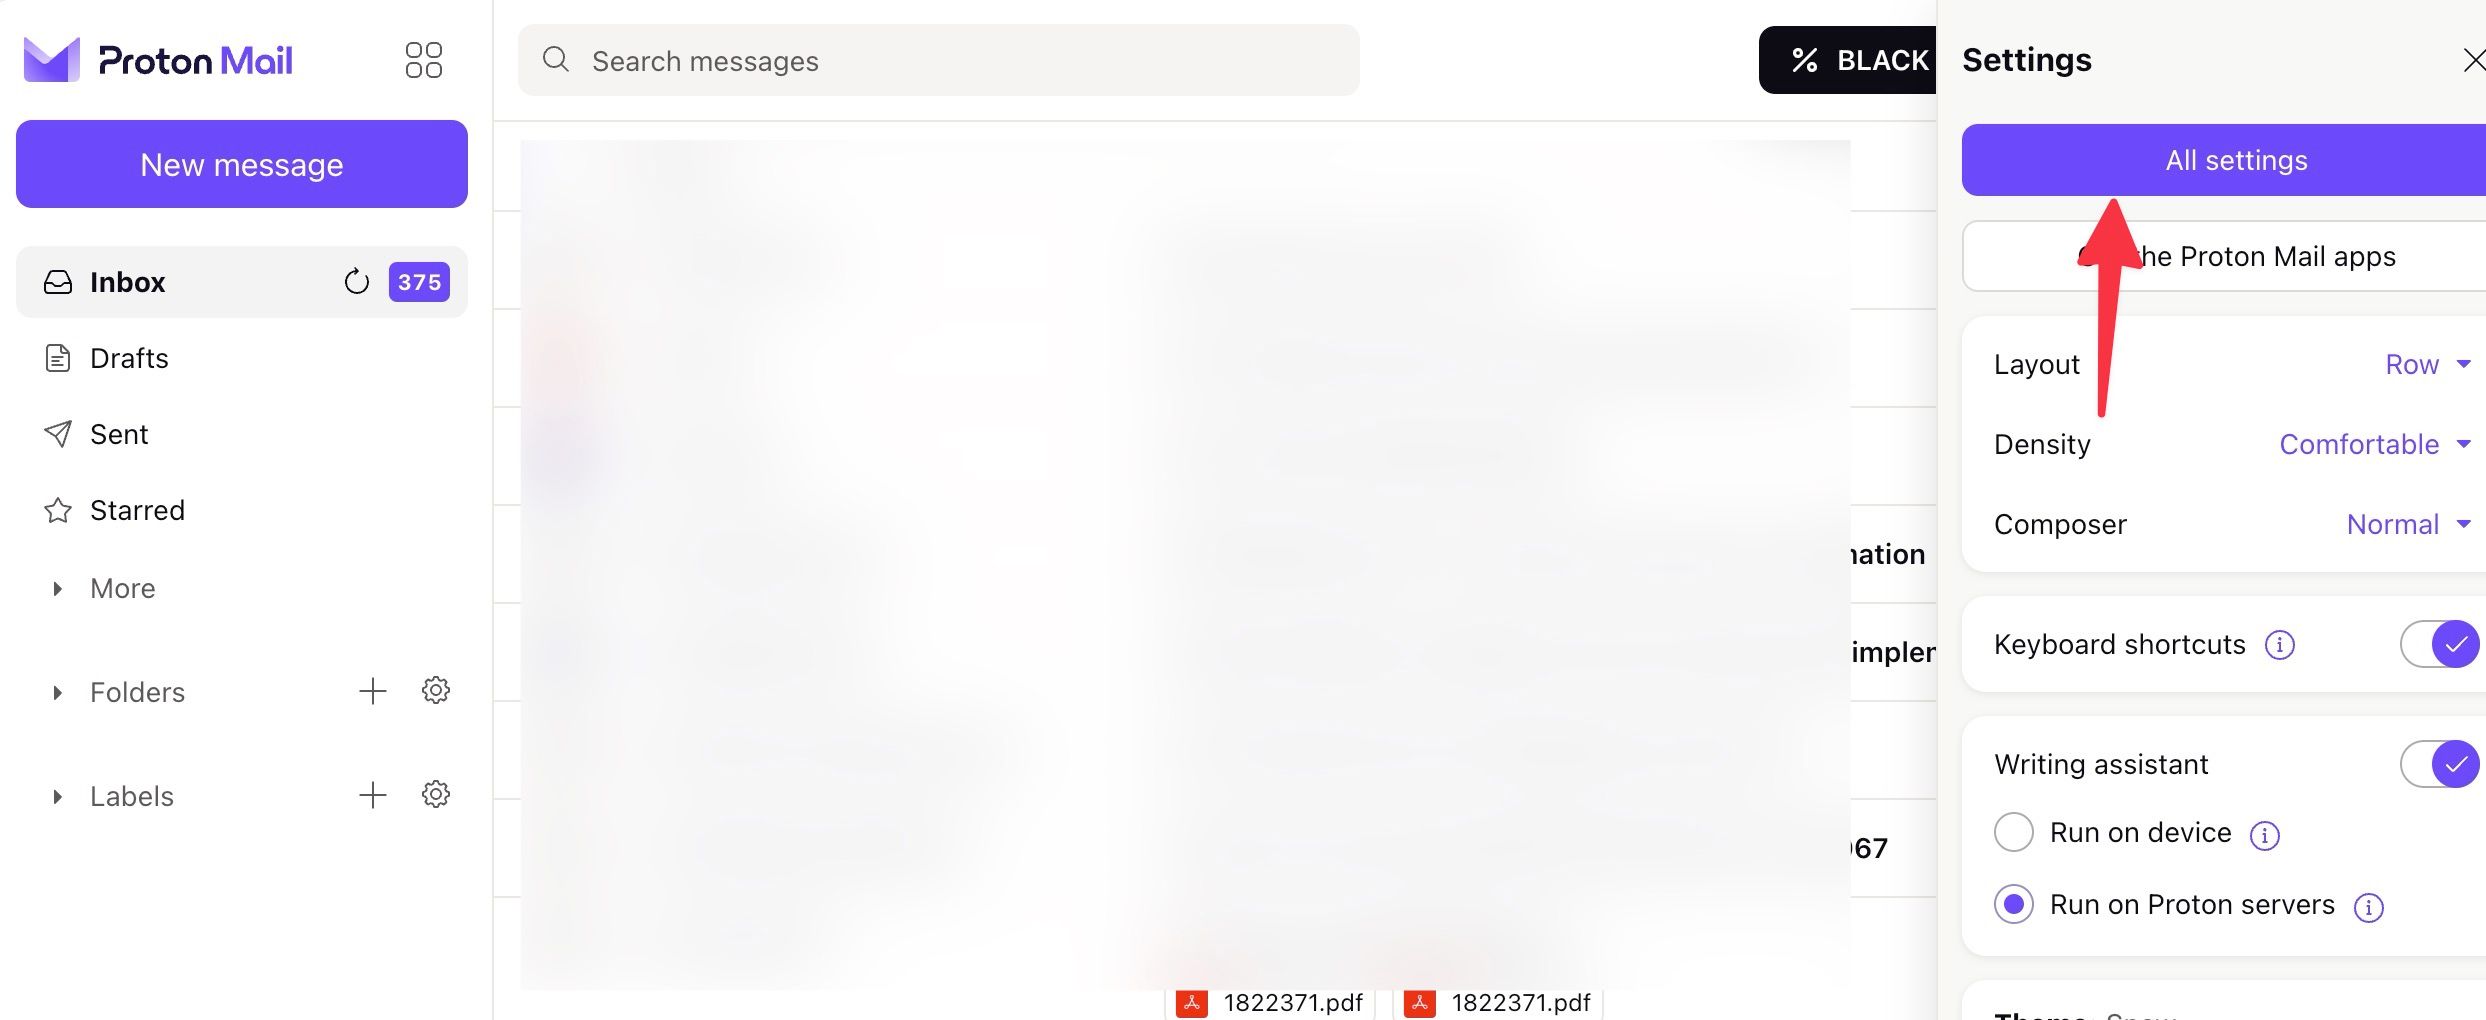
- Select the Settings gear in the upper-right corner.
- Open All settings.
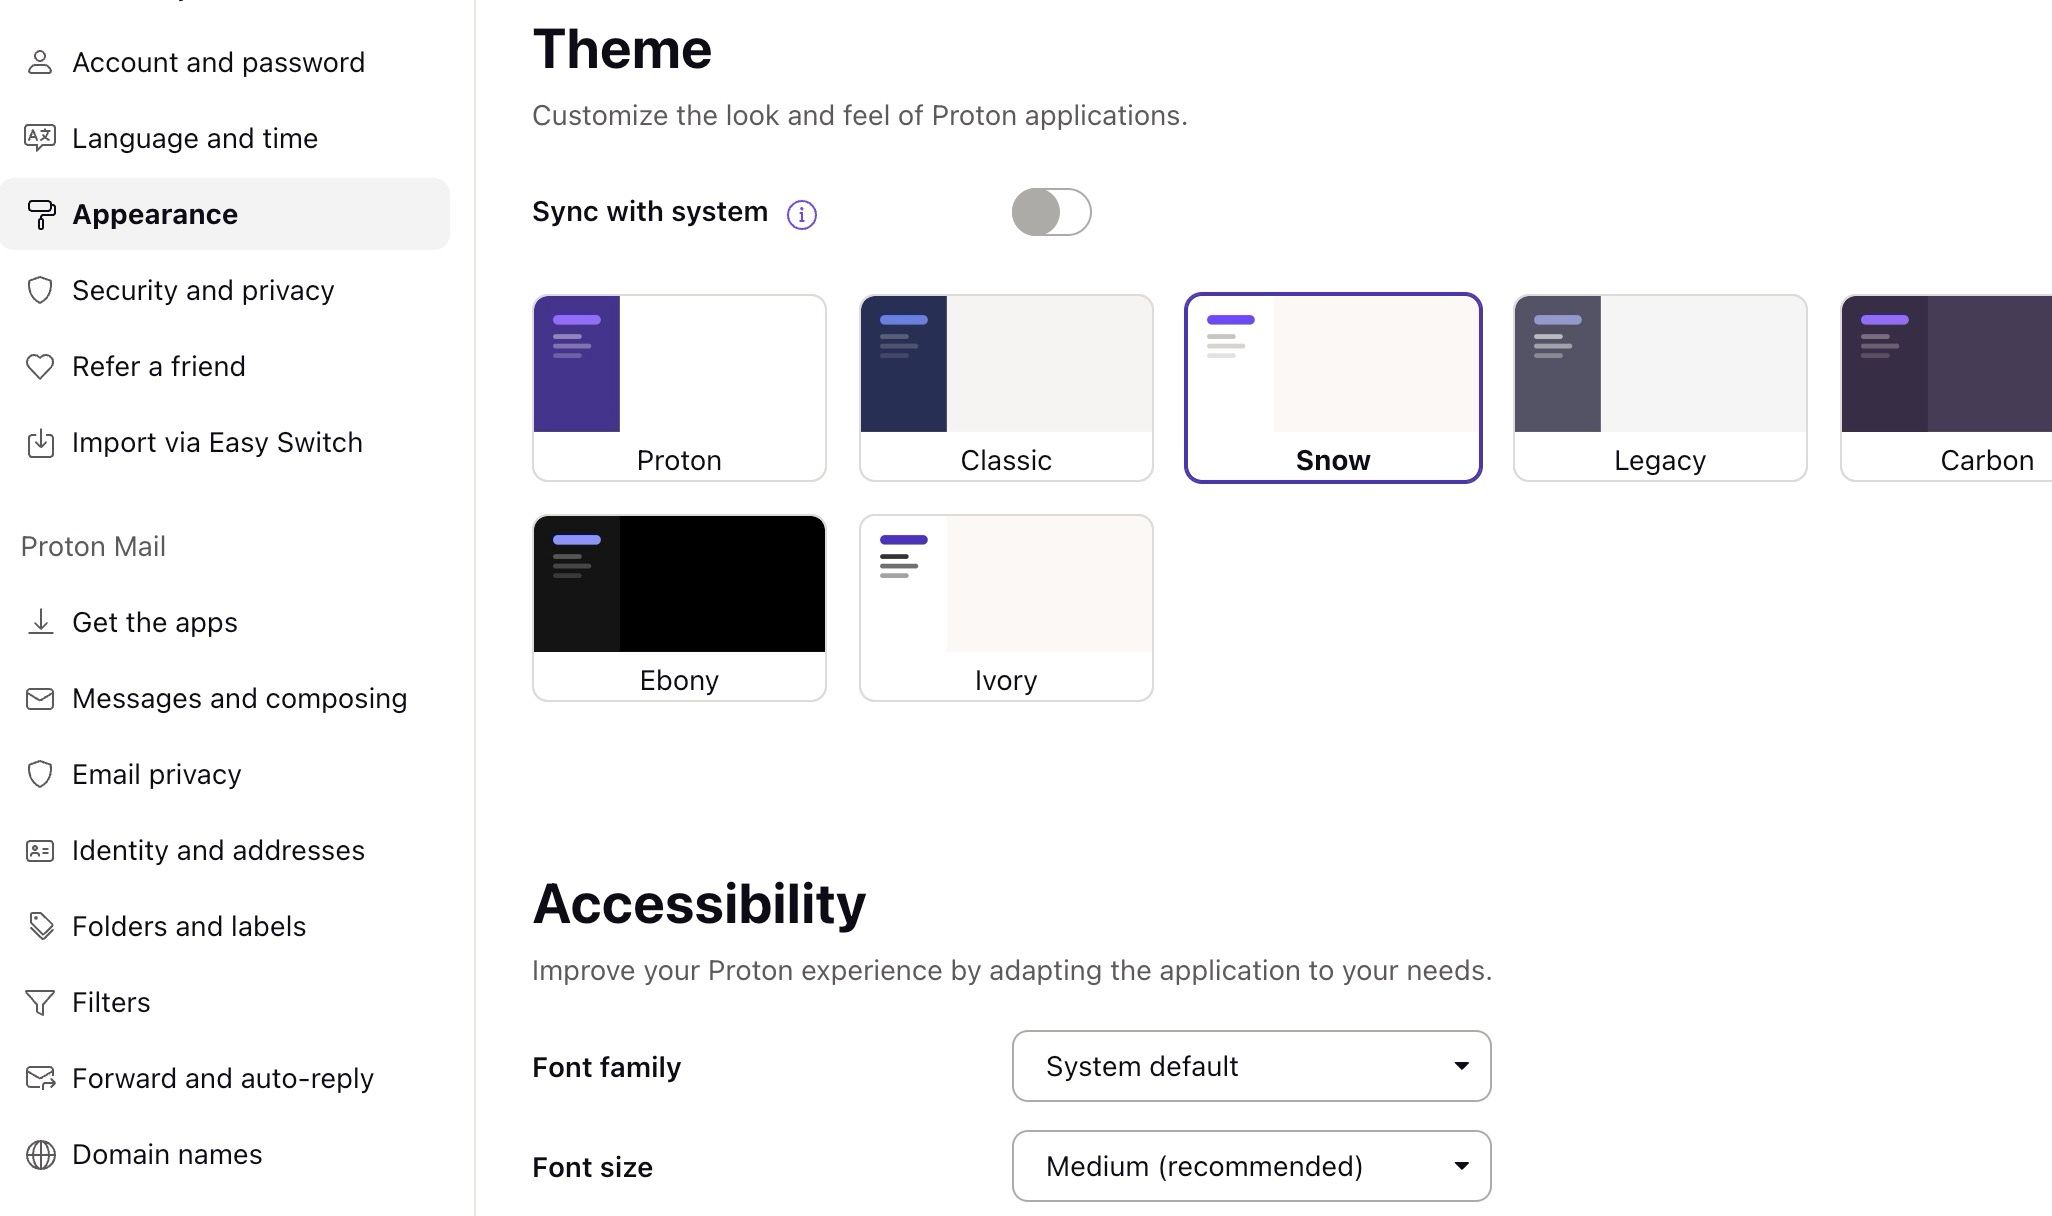
- Select Appearance from the sidebar.
- Pick another theme and tweak the font size from the accessibility menu.
I prefer the Snow theme due to its clean look and use of the system’s default fonts for a uniform experience. However, the same theming engine is not available on Proton Mail mobile apps.
8 Connect a custom domain name
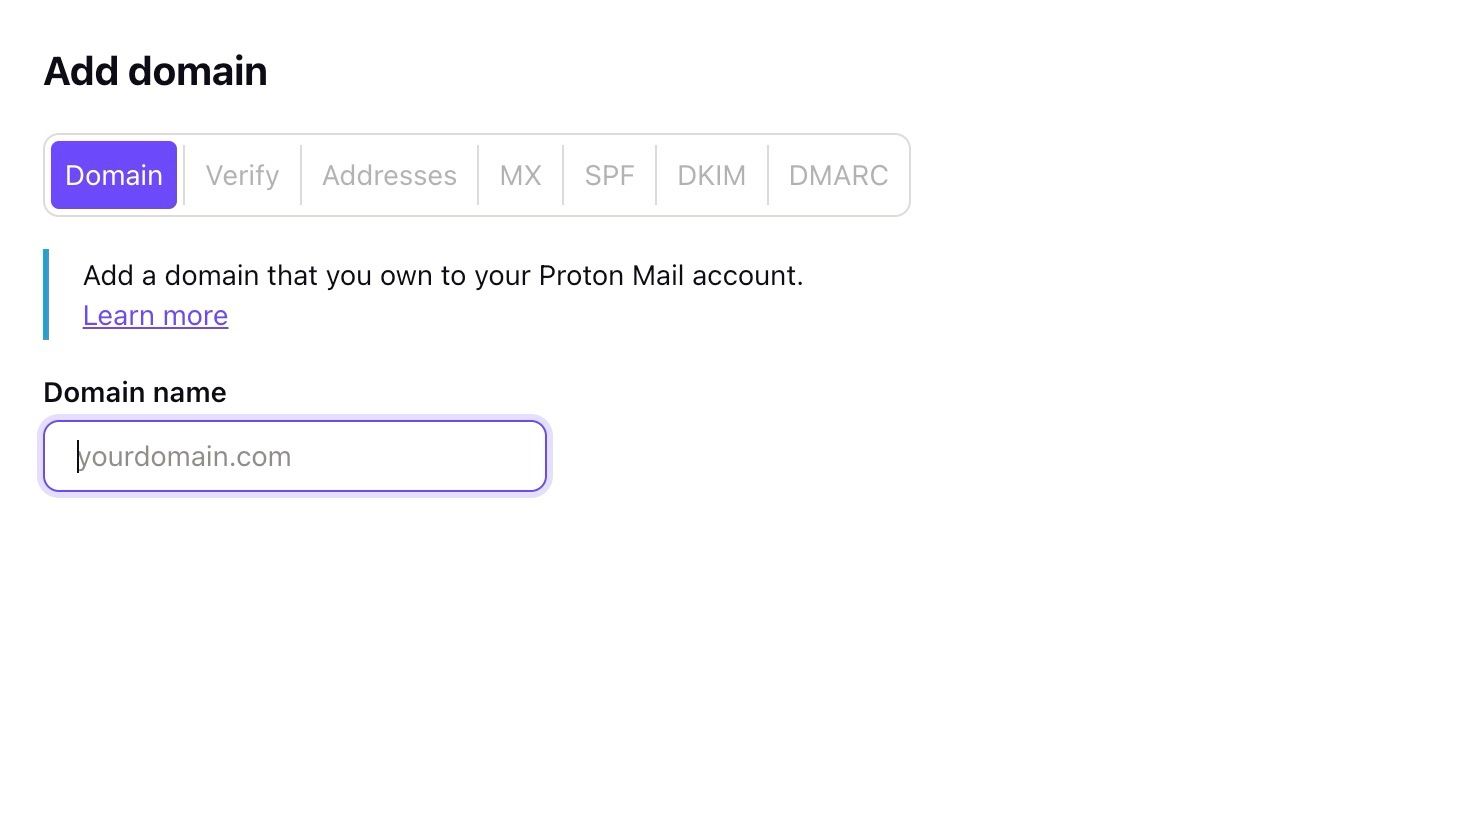
Aside from your default Proton Mail ID, you can connect up to three custom domains with your Proton Inbox. If you have one of the custom domains for personal use, go through the steps below to set it up from Settings.
- Open Proton Mail on the desktop.
- Go to Settings (refer to the steps above).
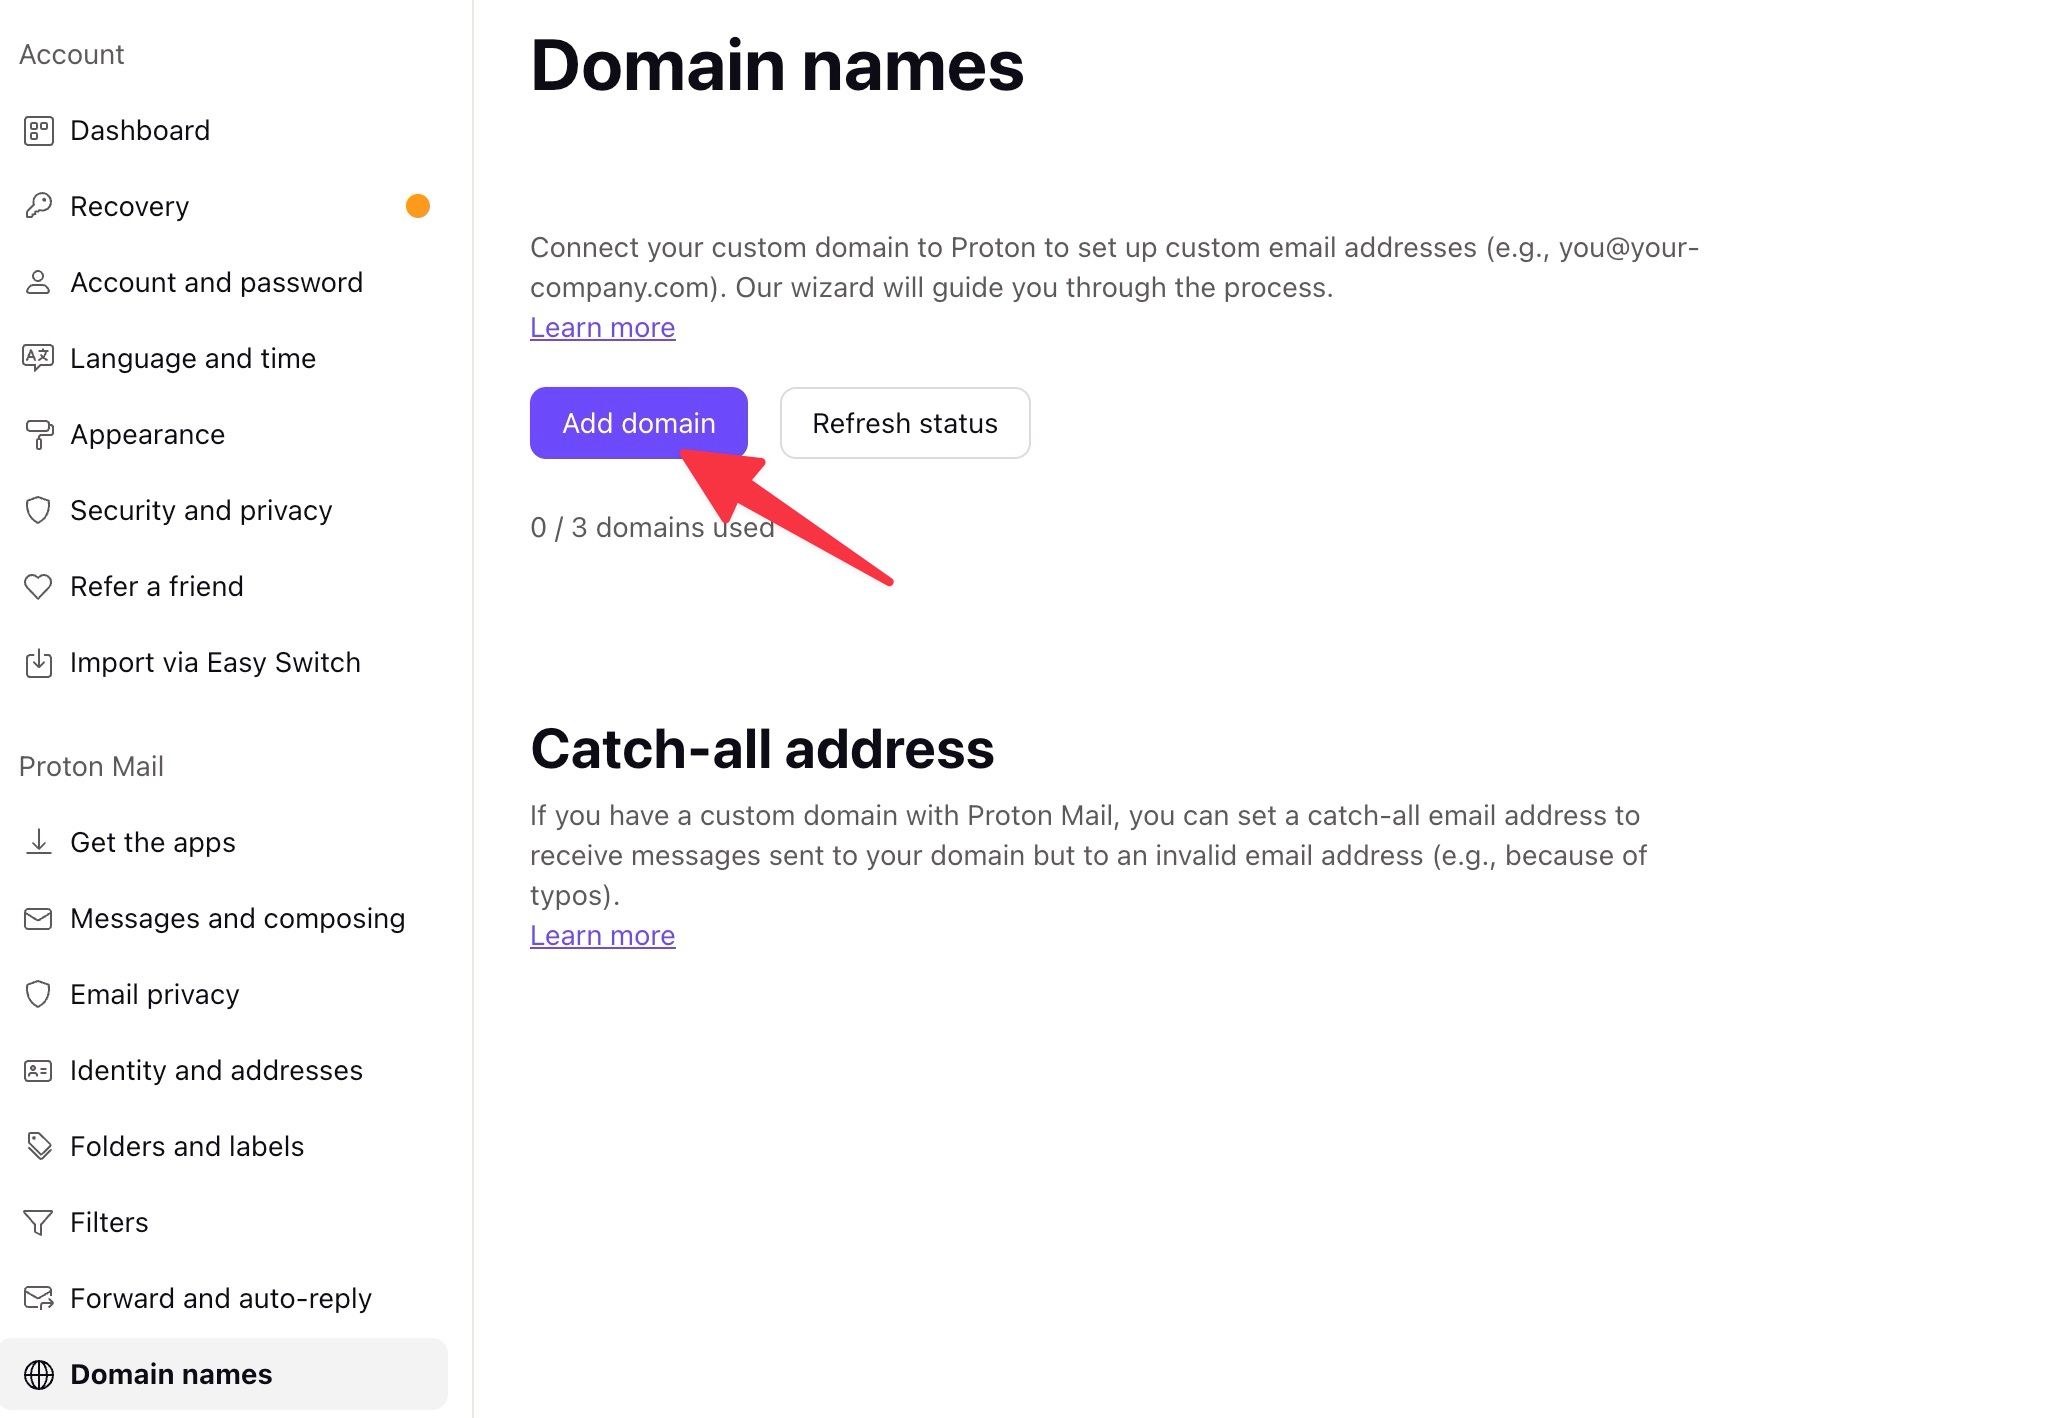
- Select Domain names under Proton Mail from the sidebar.
- Click Add domain.
- Enter your email domain name. Verify it, and go through the on-screen instructions to complete the setup process.
7 Set up forwarding from Gmail
Although you moved from Gmail to Proton Mail, you don’t want to miss important messages. Proton Mail offers an option to forward your Gmail messages to your Proton inbox. Here’s how to set it up.
- Open Proton Mail Settings (check the steps above).
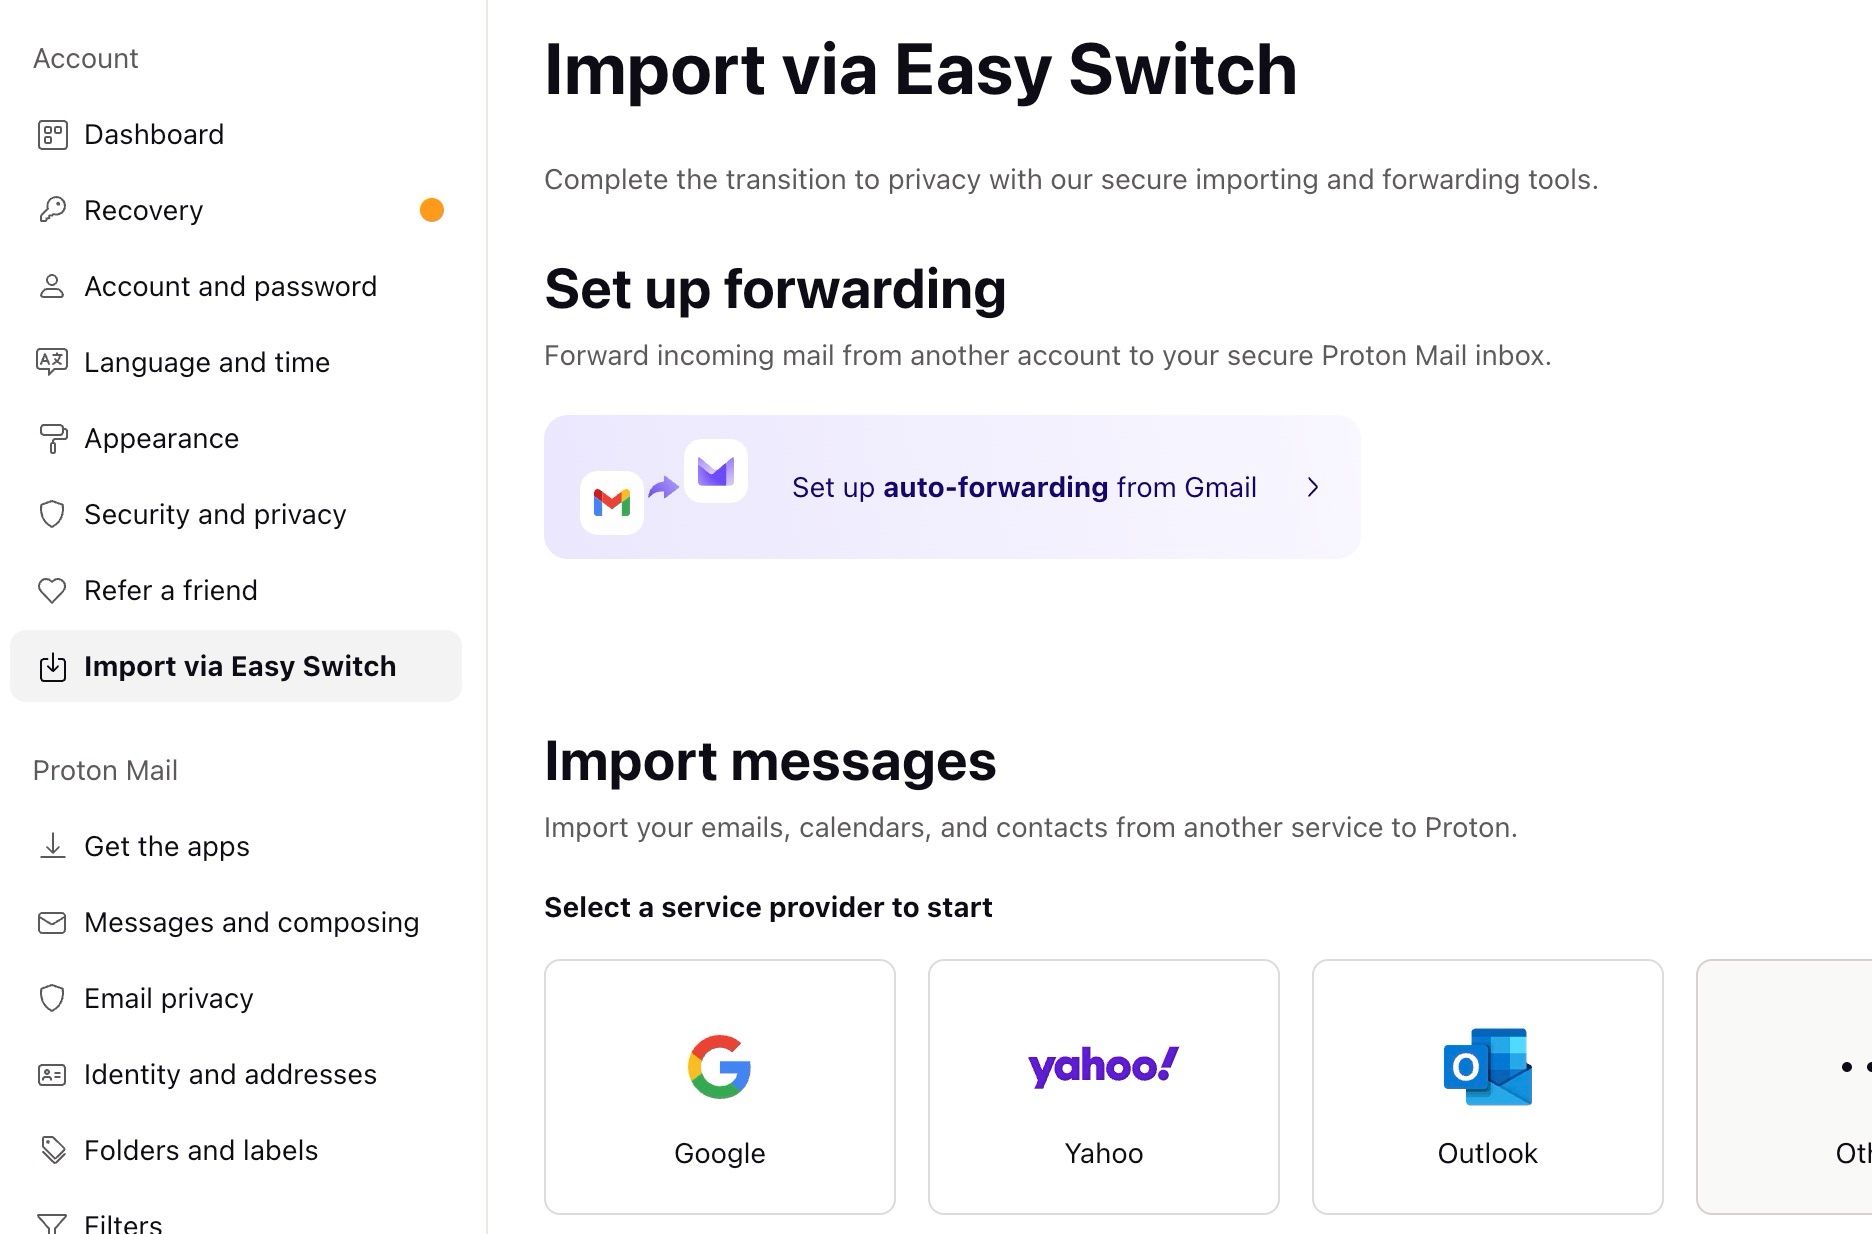
- Select Import via Easy Switch.
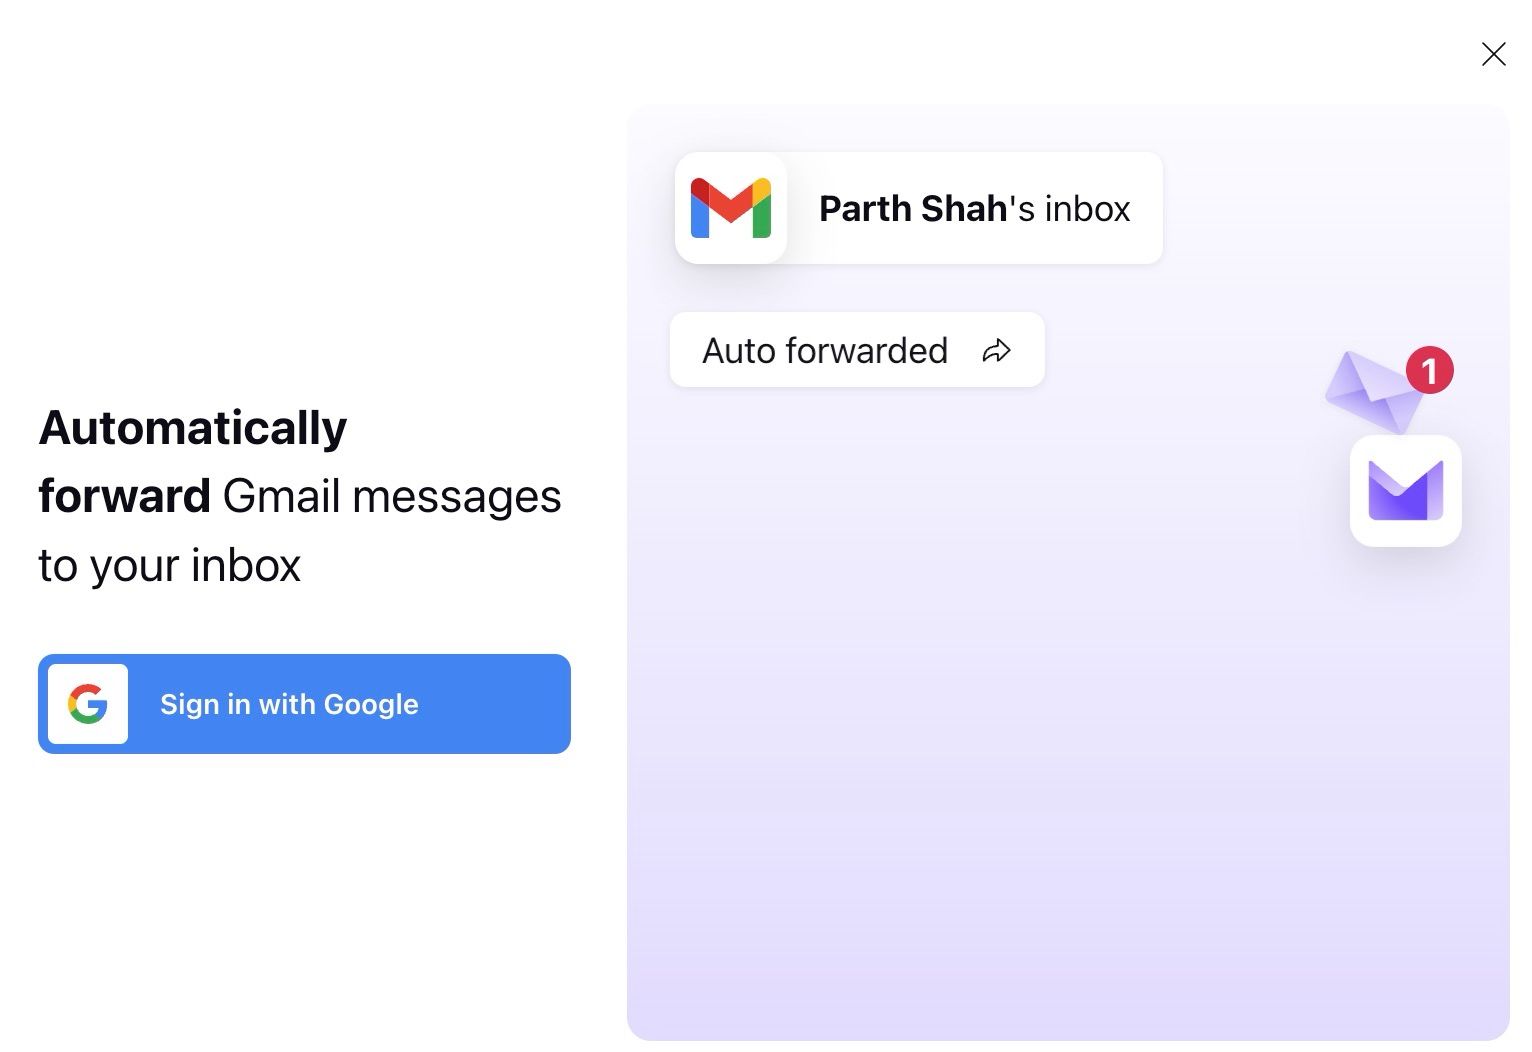
- Click Set up auto-forwarding from Gmail.
- Sign in with your Google account and follow the on-screen instructions.
You are all set to receive your Gmail messages in your Proton Mail inbox on your phone and desktop.
Related
7 things I love about Proton Mail that Gmail lacks
Proton Mail perks you are missing out on
6 Import messages from other email services
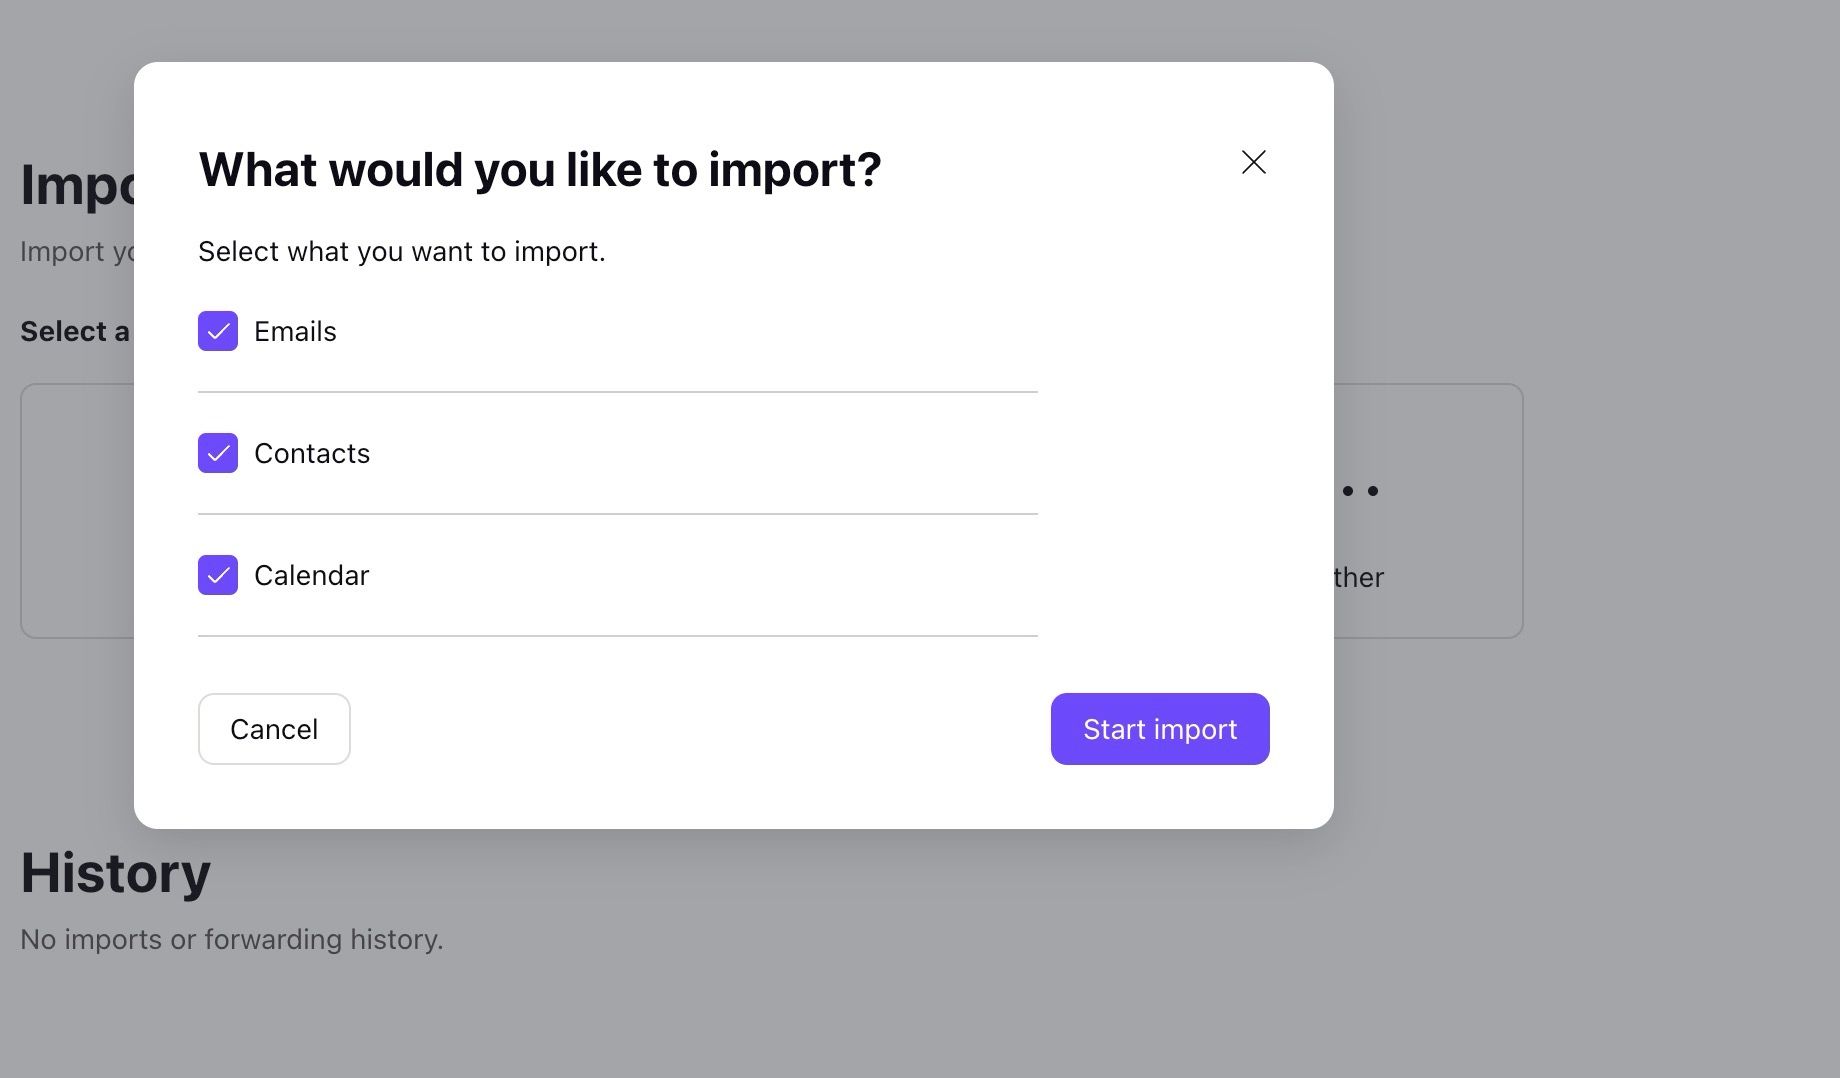
If you use Outlook, Yahoo, or another third-party email provider, you can import your emails, calendars, and contacts to the Proton ecosystem in no time. Here’s what you’ll do.
- Navigate to Proton Mail Settings.
- Select Import via Easy Switch and select a service provider to start. Let’s select Outlook.
- Select what you want to import. You can pick emails, contacts, and calendars. Click Start import.
- Sign in to your Microsoft account, give the required permissions, and move your existing data.
5 Protect your privacy with dark web monitoring
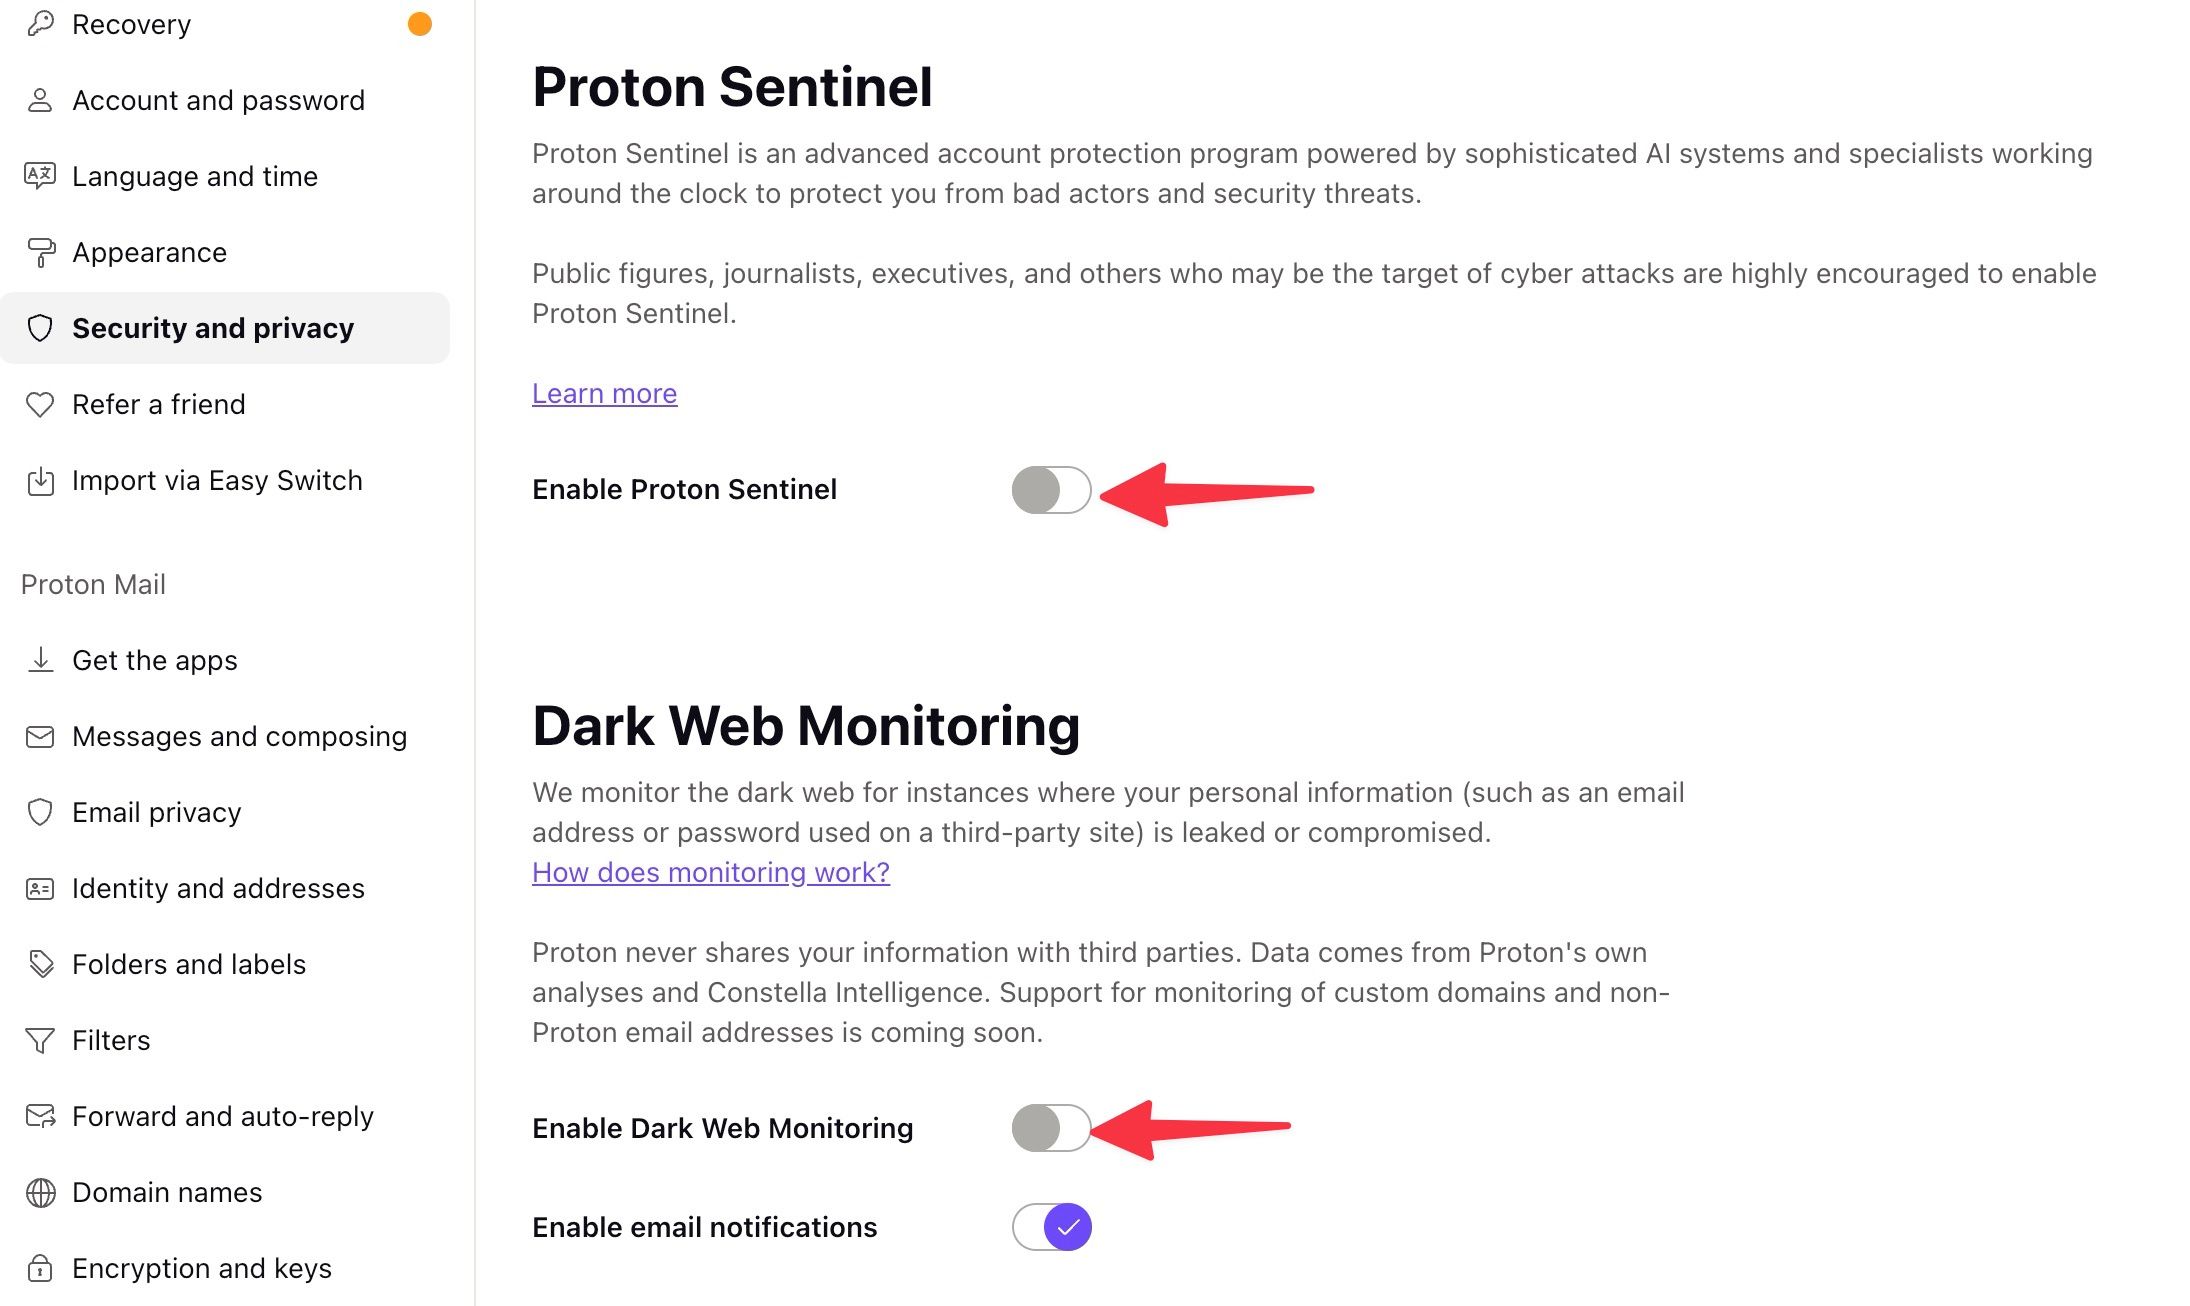
Proton turns off dark web monitoring by default. When you activate the option, the system monitors the dark web for instances where your personal information, such as an email address or password used on another site, is leaked or compromised.
- Open Proton Mail Settings.
- Select Security and privacy from the sidebar.
- Turn on the Enable Dark Web Monitoring toggle.
- You can also turn on Enable Proton Sentinel to protect your inbox from bad actors and security threats. This option is recommended for public figures, journalists, and executives.
You can glance over session management (and revoke unknown devices) and security events from the same menu.
4 Enable and use Proton Scribe
Proton Scribe is a private AI writing assistant that writes and proofreads emails for you. Unlike Gmail and Outlook, you can run the assistant on a device (for better privacy) or in the cloud. Go through the steps below to activate and use it.
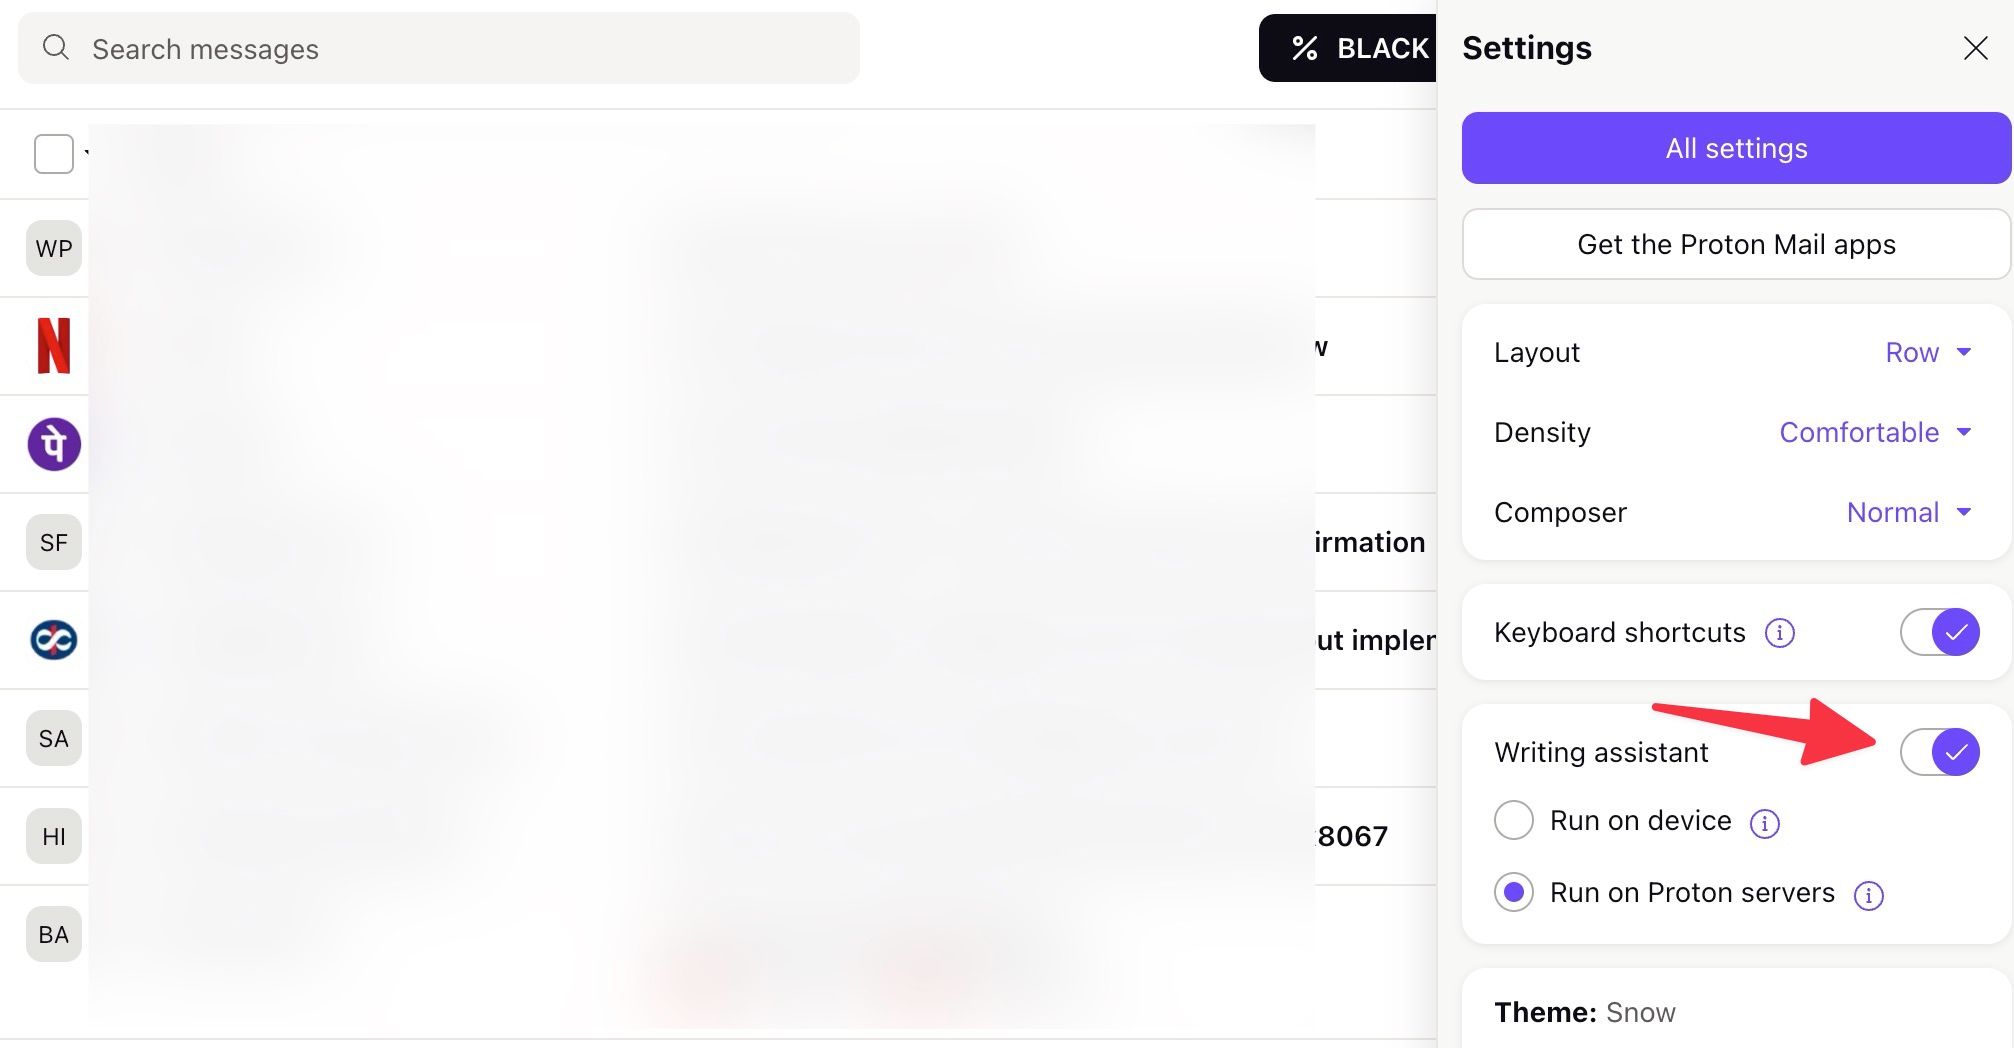
- Open Proton Mail on the web and click the Settings gear.
- Turn on the Writing assistant toggle.
- Select Run on a device or Run on Proton servers. Proton downloads a 3.5GB AI model on your computer when you run it on the device.
- Select New message at the top.
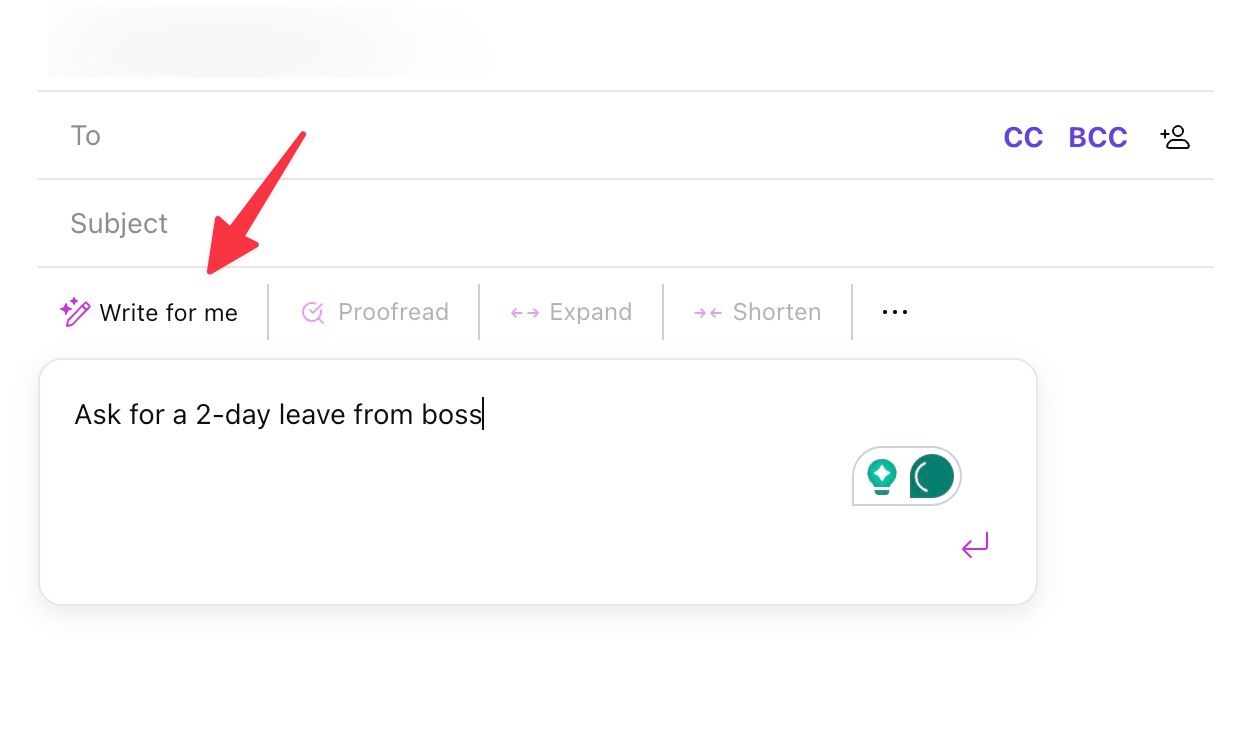
- Click Write for me.
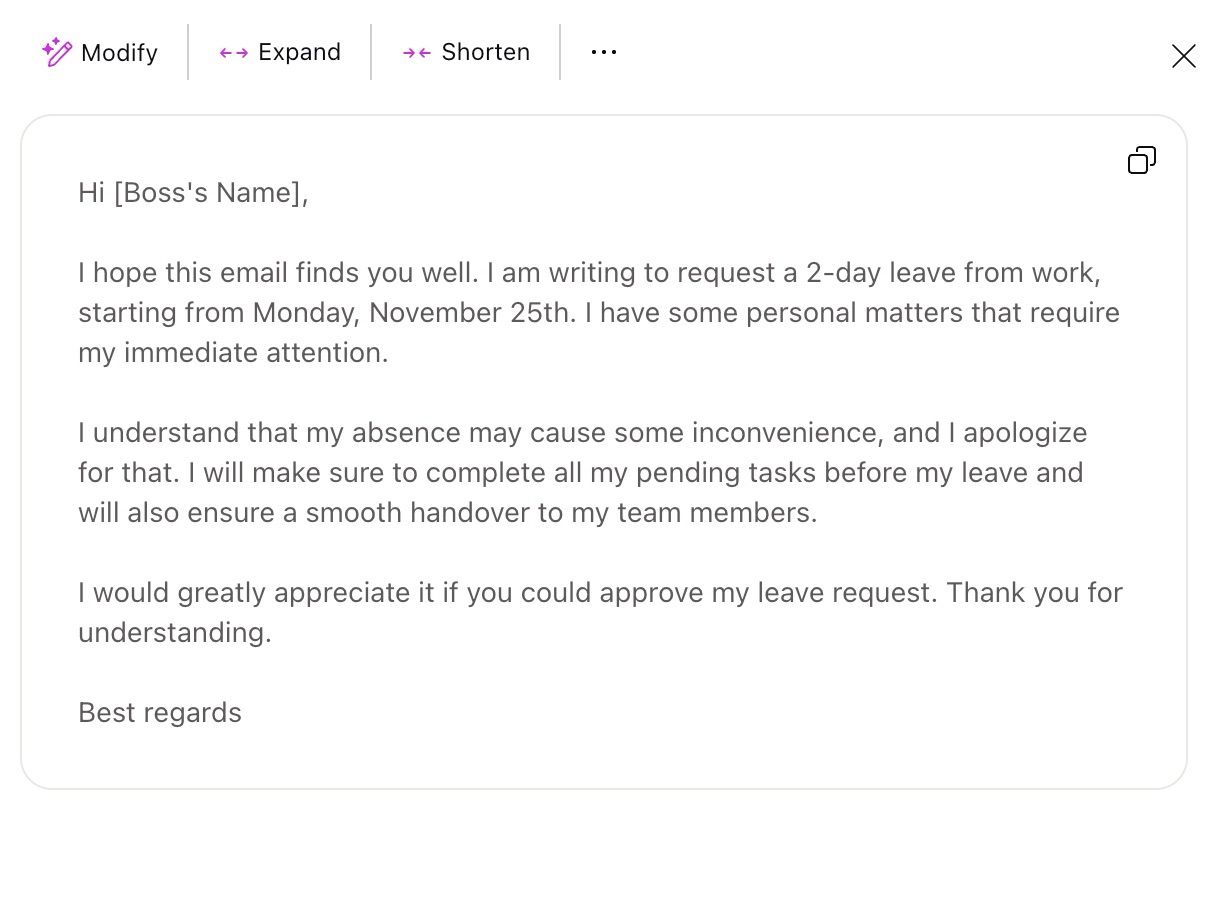
- Enter your text prompt and generate an email in no time.
You can also proofread, expand, shorten, or formalize the tone.
3 Create and manage folders and labels
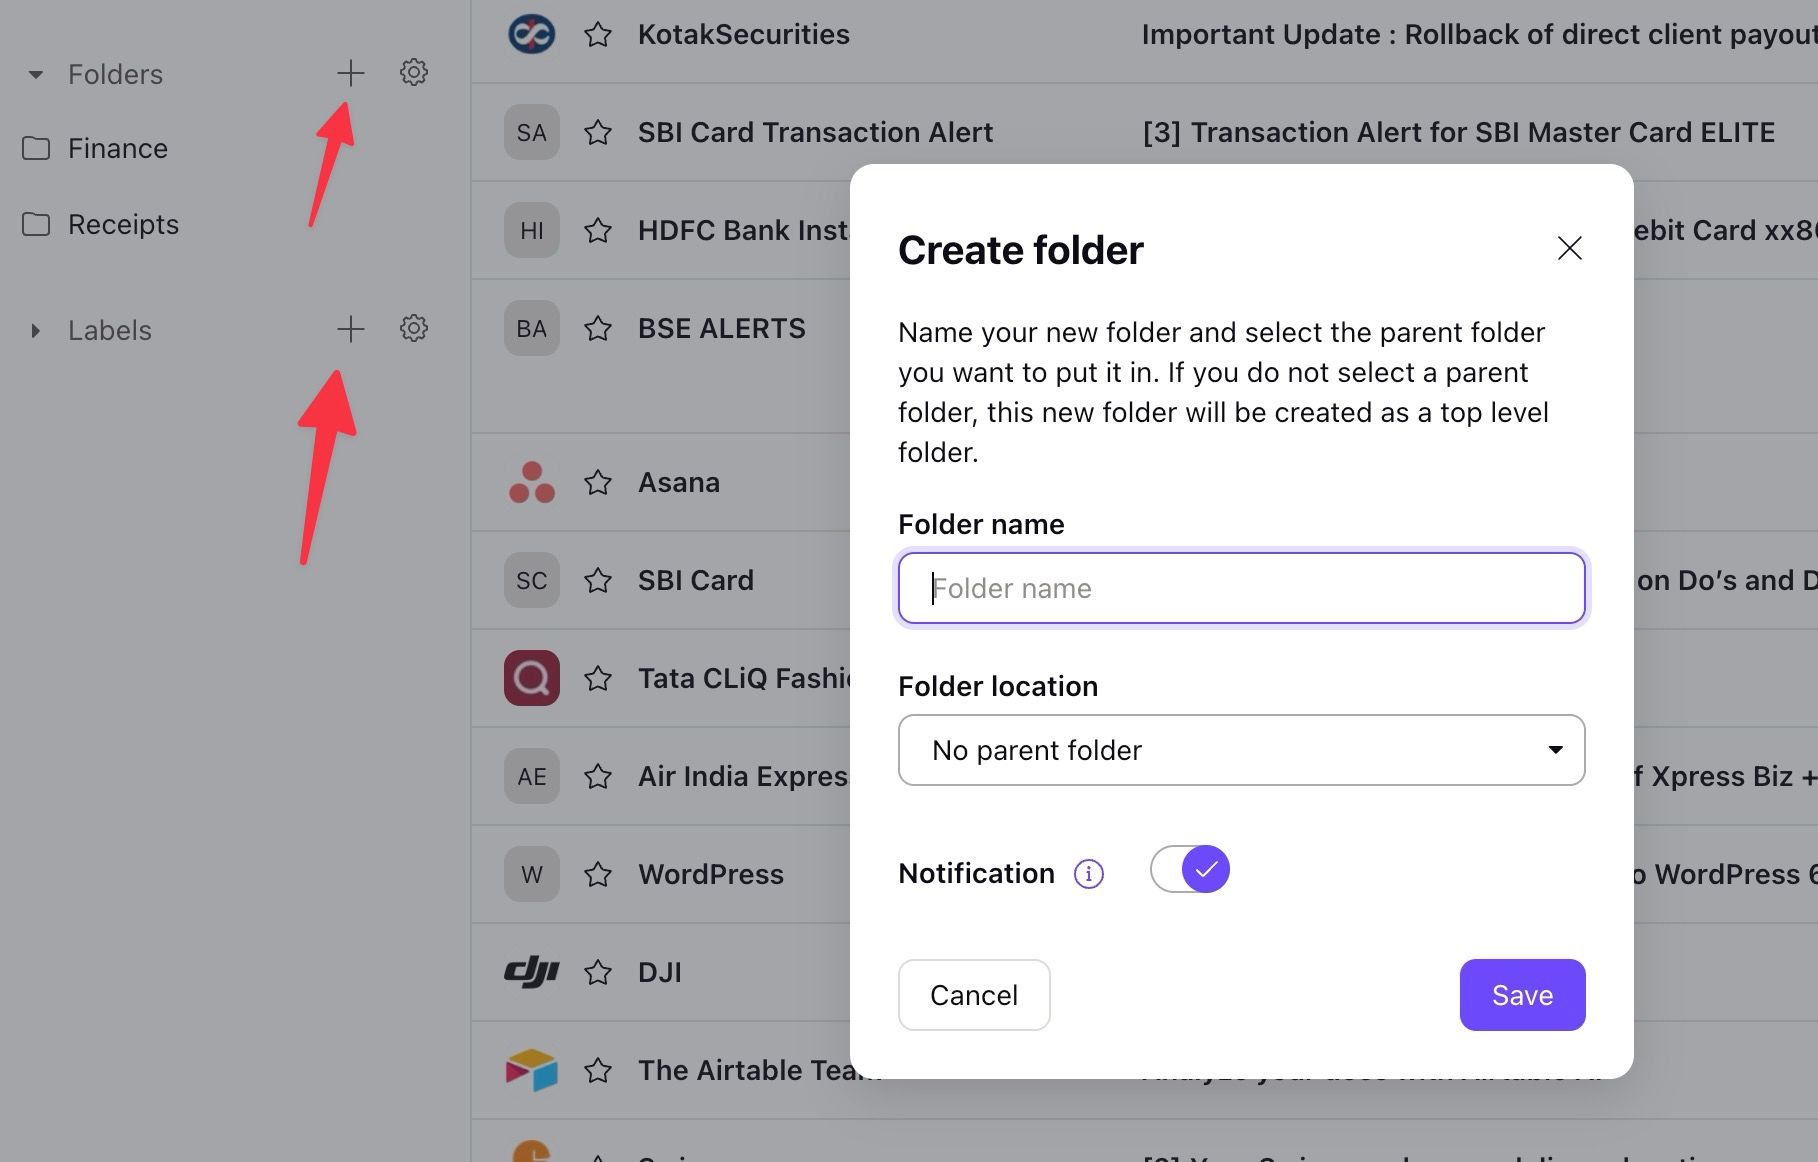
When you use Proton Mail for personal use, you may soon fill your inbox with hundreds of emails. You can create multiple folders (like Work, Personal, and Finance) and use labels (like Urgent, To Do, and Follow Up) to organize your emails efficiently.
- Open Proton Mail and click the + icon beside Folders or Labels.
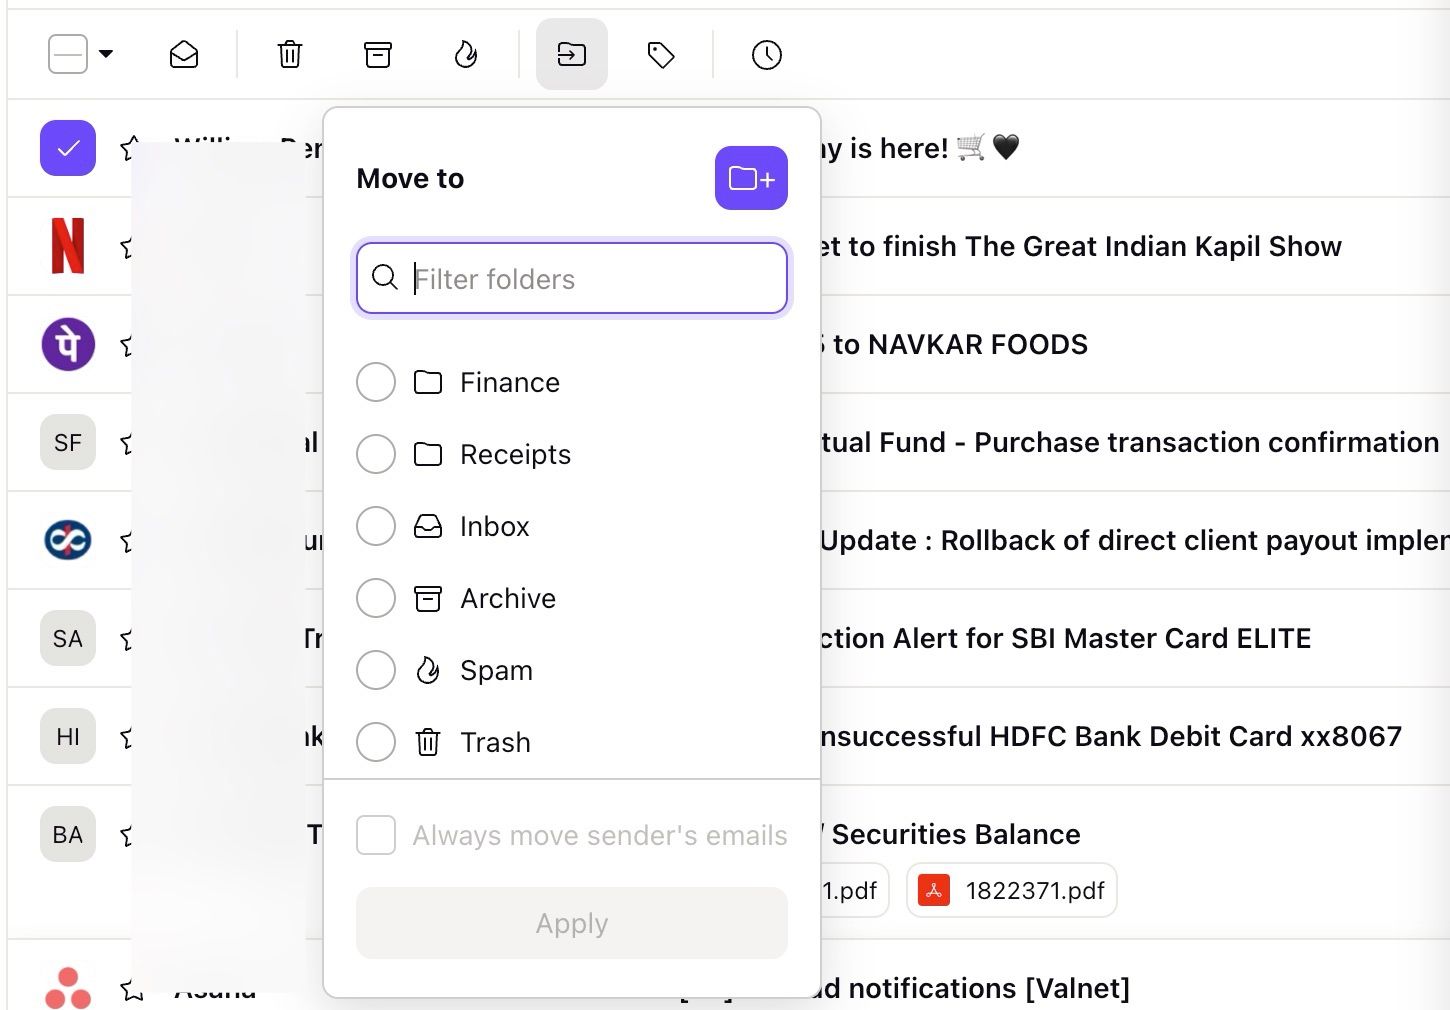
- After adding relevant folders and labels, you are set to move your emails to them.
- Select an email and click the folder or label icon at the top to organize them.
2 Enable auto-reply
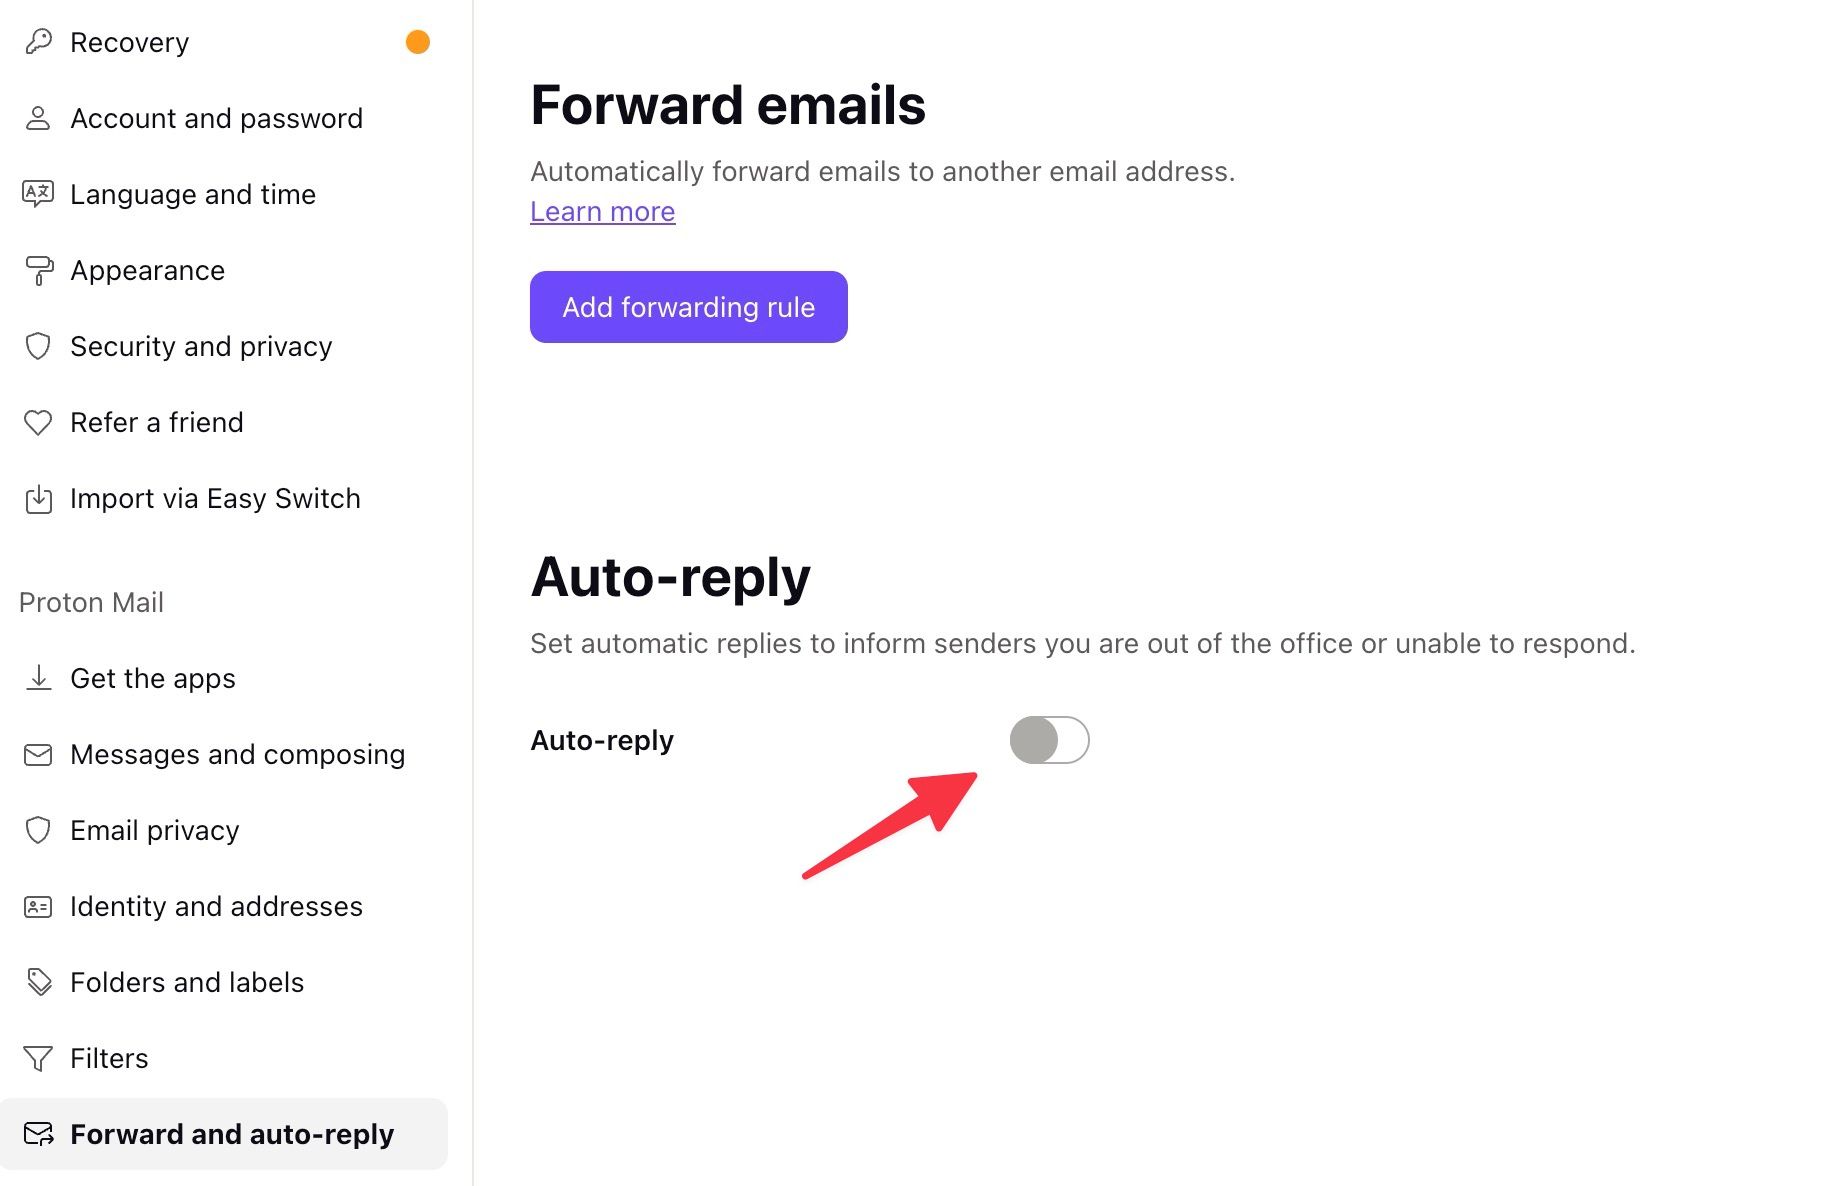
Use Proton Mail’s auto-reply function to share automated replies when you are out of the office or unable to respond.
- Go to Proton Mail Settings
- Select the Forward and auto-reply tab.
- Turn on the Auto-reply toggle.
- Set a duration, start date, time, end date, time, and time zone.
- Type your message with a rich toolbar.
- Select Save.
1 Send encrypted messages and enable the expiring date
Proton Mail is known for security and privacy. You can send encrypted messages and set an expiration date so that the system automatically deletes emails from the recipient’s inbox and your sent folder.
- Open Proton Mail and compose a new message.
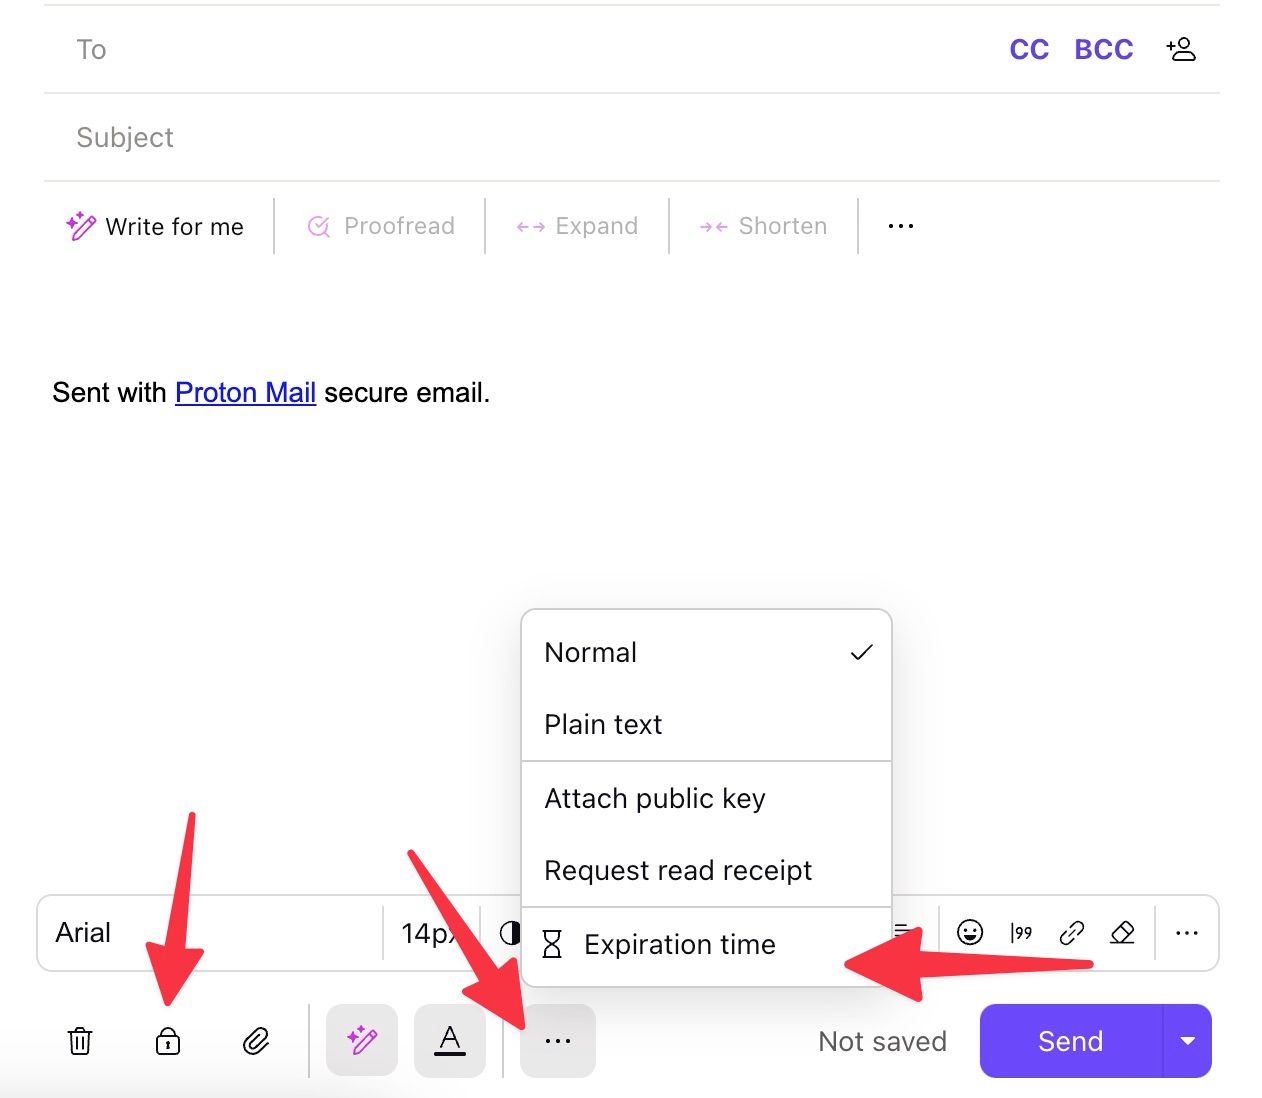
- Attach relevant files, draft a message, and click the lock icon at the bottom.
- Enter your password, type a password hint, and set encryption.
- Select the overflow menu (the three dots) and click Expiration time.
- Set the date and time from the following menu.
- Click Set, and you are good to go.
Related
How Proton Mail encrypts your email messages
Proton Mail’s premium privacy provisions explained
A secret weapon for email sanity
Proton Mail is more than a private inbox. The company hasn’t skimped on important features to make your day-to-day email management a breeze. Use filters, labels, and folders strategically, leverage Proton Mail’s unique features like encrypted messages and self-destructing emails, and customize your settings to match your workflow. However, it isn’t entirely free of issues. Check out our dedicated guide to learn common Proton Mail problems and their solutions.


